Webflow tables
Webflow’s CMS rich-text field doesn’t support native HTML tables. When Sitefire publishes an article that contains a table, we work around this by embedding the table markup as raw HTML inline in the post body. You then need to lift that markup into a proper HTML Embed block in the Webflow Designer so it renders as a styled table on the live site.
Sitefire applies basic out-of-the-box styling to embedded tables. You can adjust the default styles in the Webflow integration settings inside Sitefire.
Why this extra step?
Webflow’s rich-text editor strips <table> elements on save and the CMS API doesn’t accept tables in rich-text fields either. The only reliable way to render a table inside a CMS-driven blog post is through an HTML Embed component, which has to be added in the Designer by hand. Sitefire ships the table markup with the article so you can do this in seconds.
Convert the inline code into an embed
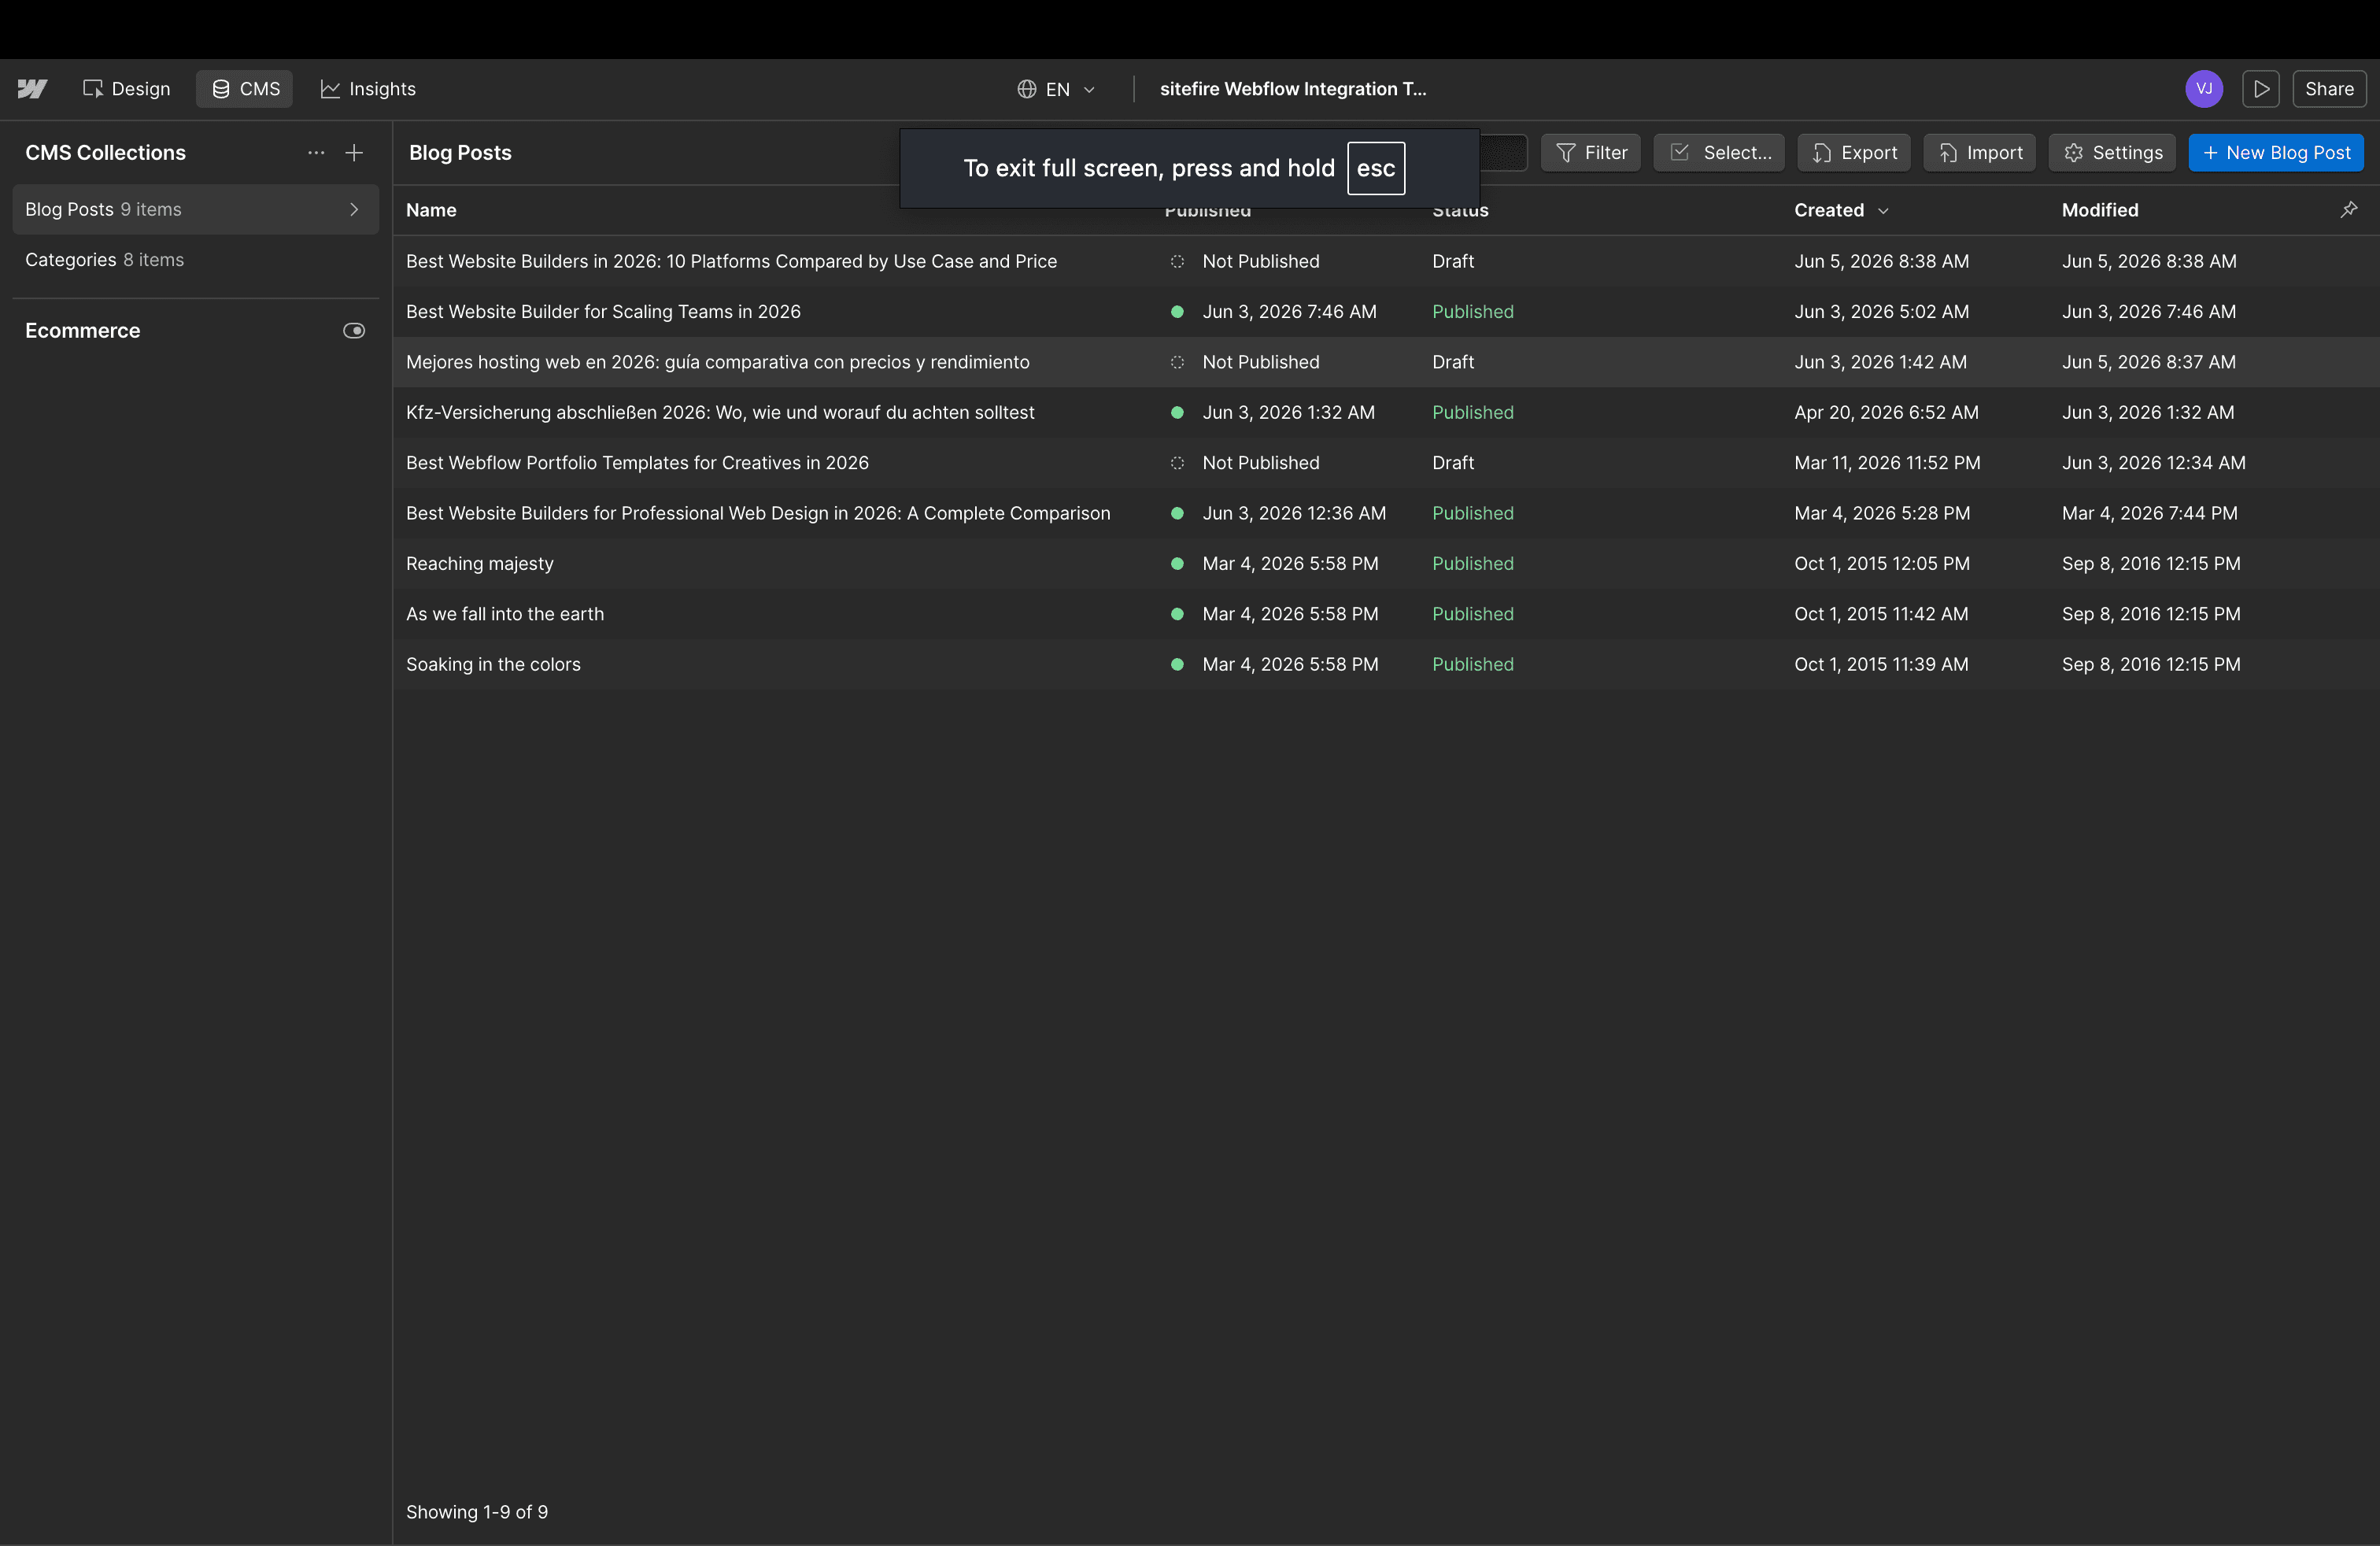
Open the post in the Webflow CMS
After Sitefire publishes the article, open it in the Webflow Designer under your blog collection. You’ll see the table rendered as a block of raw HTML inside the post body.
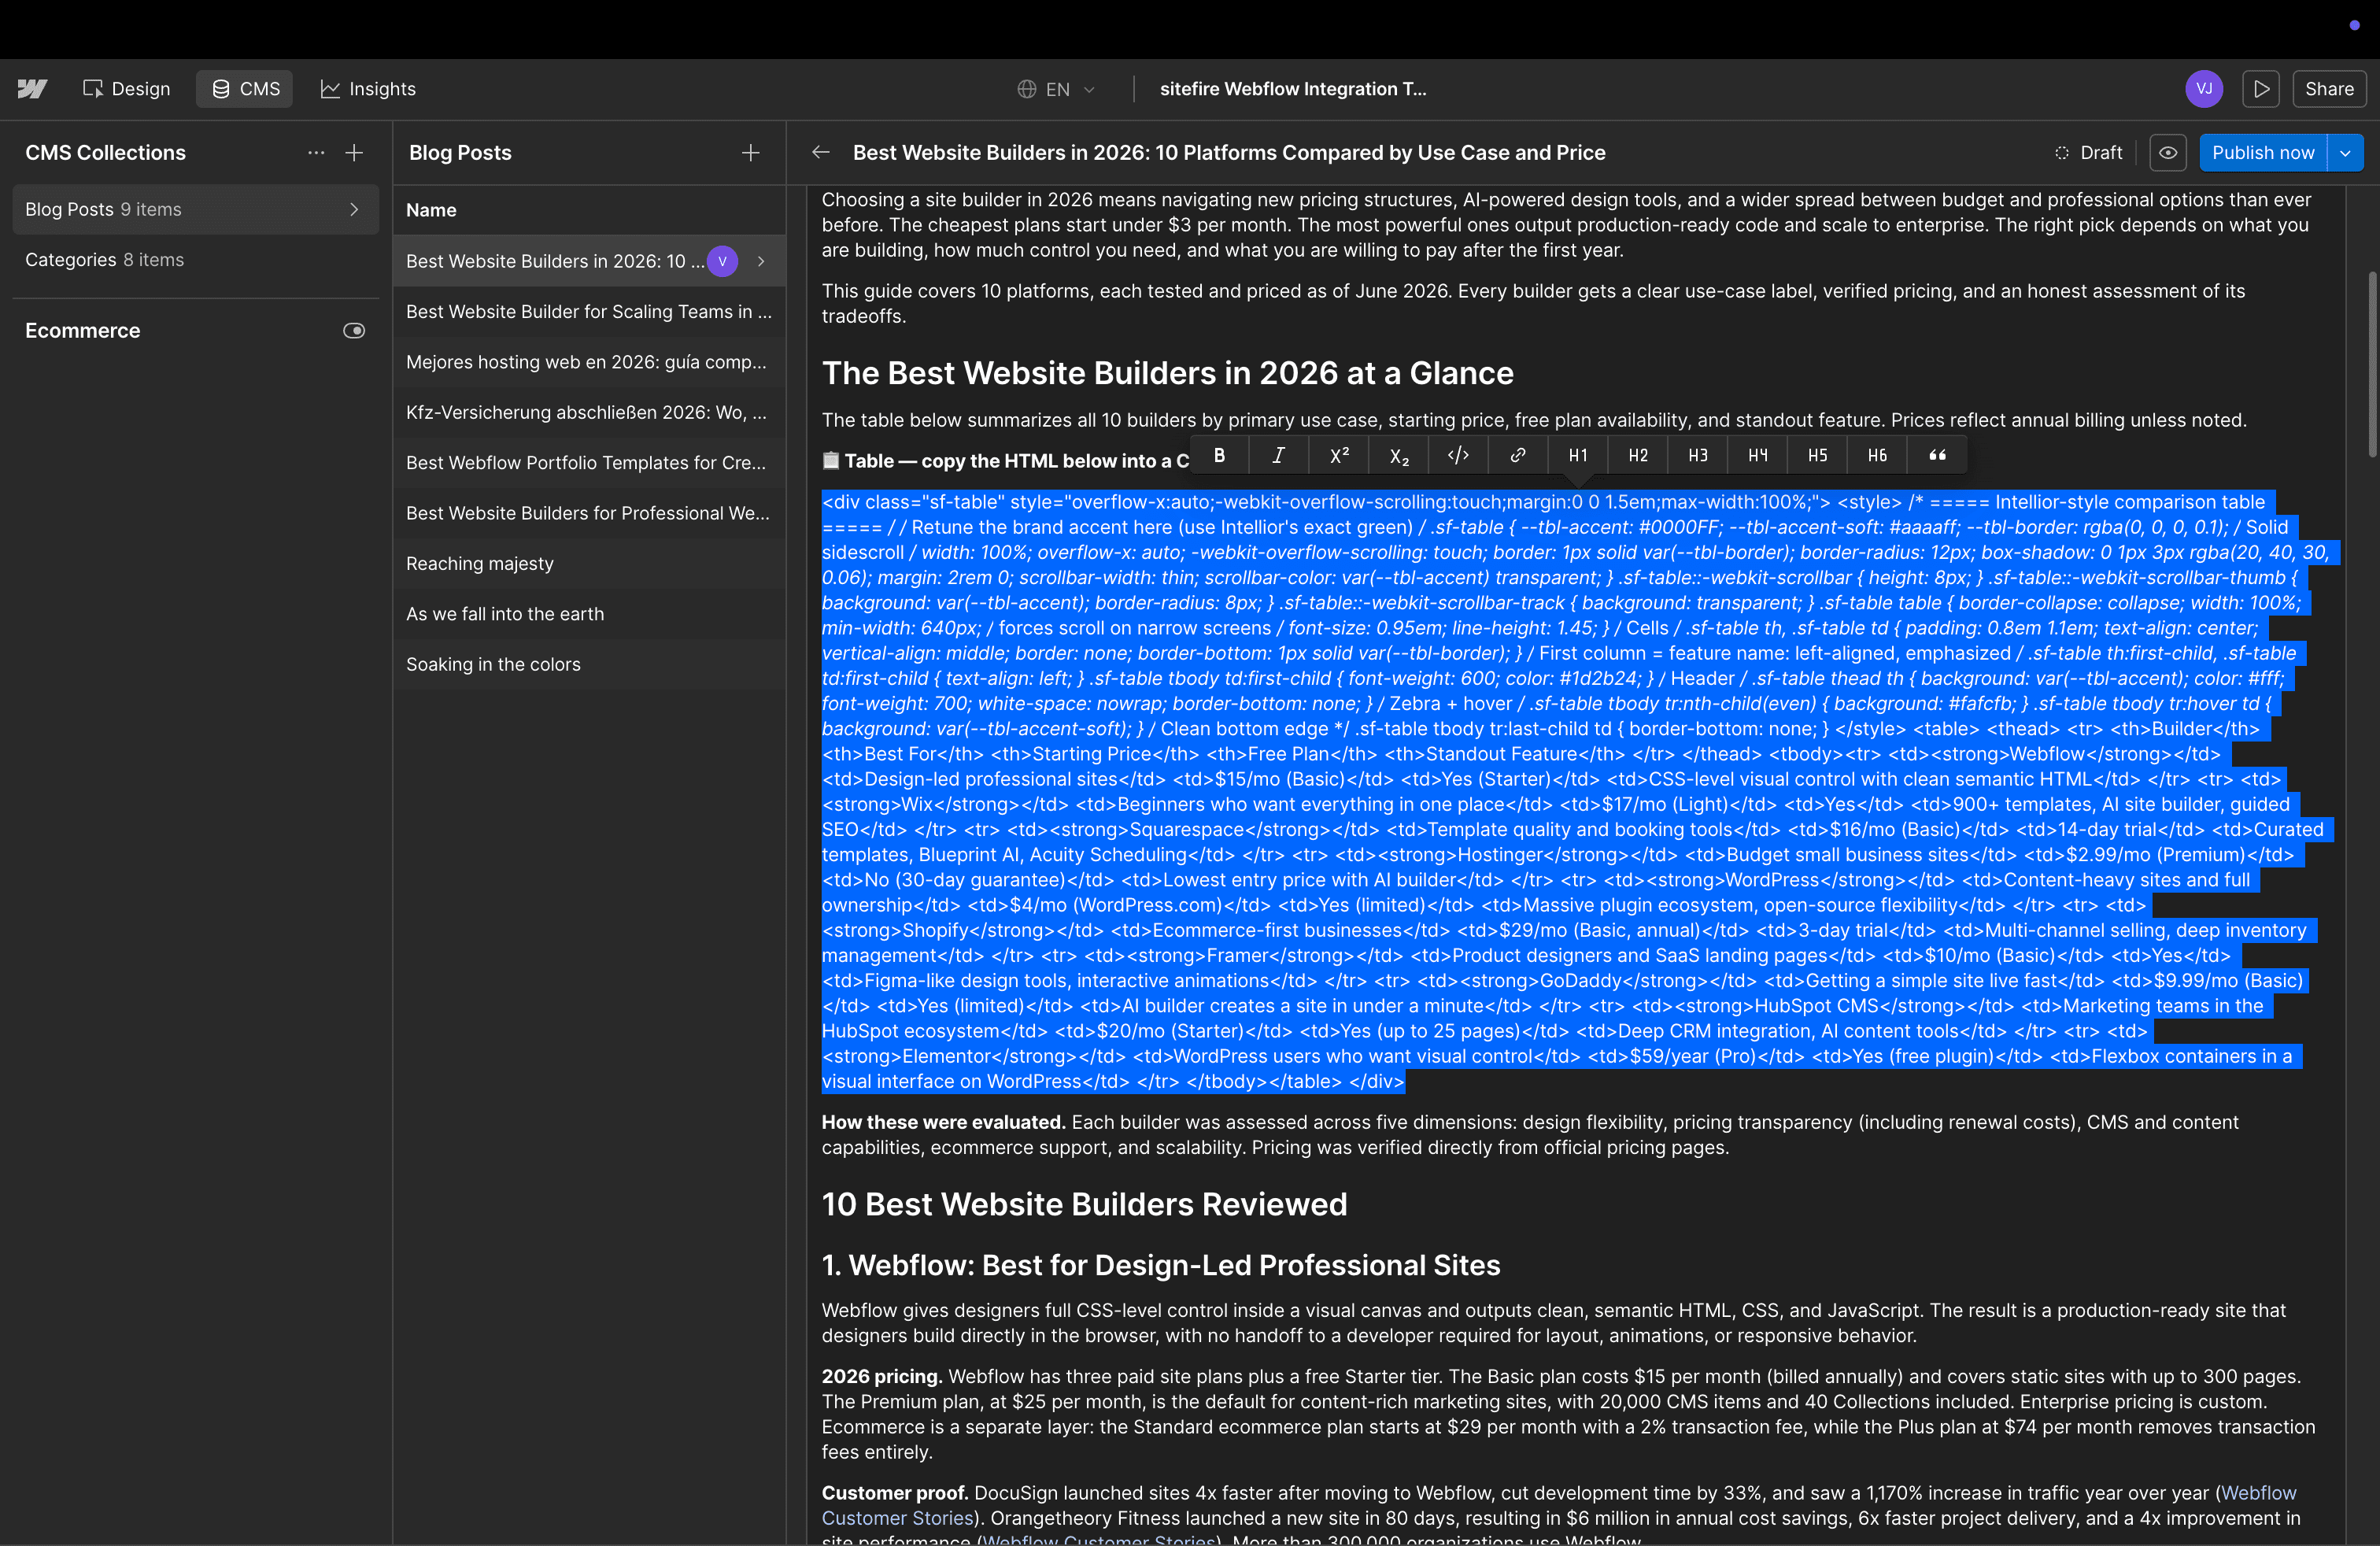
Select and cut the code block
Highlight the full block of table markup - the wrapping <div class="sf-table"> and everything inside it - and cut it to your clipboard.
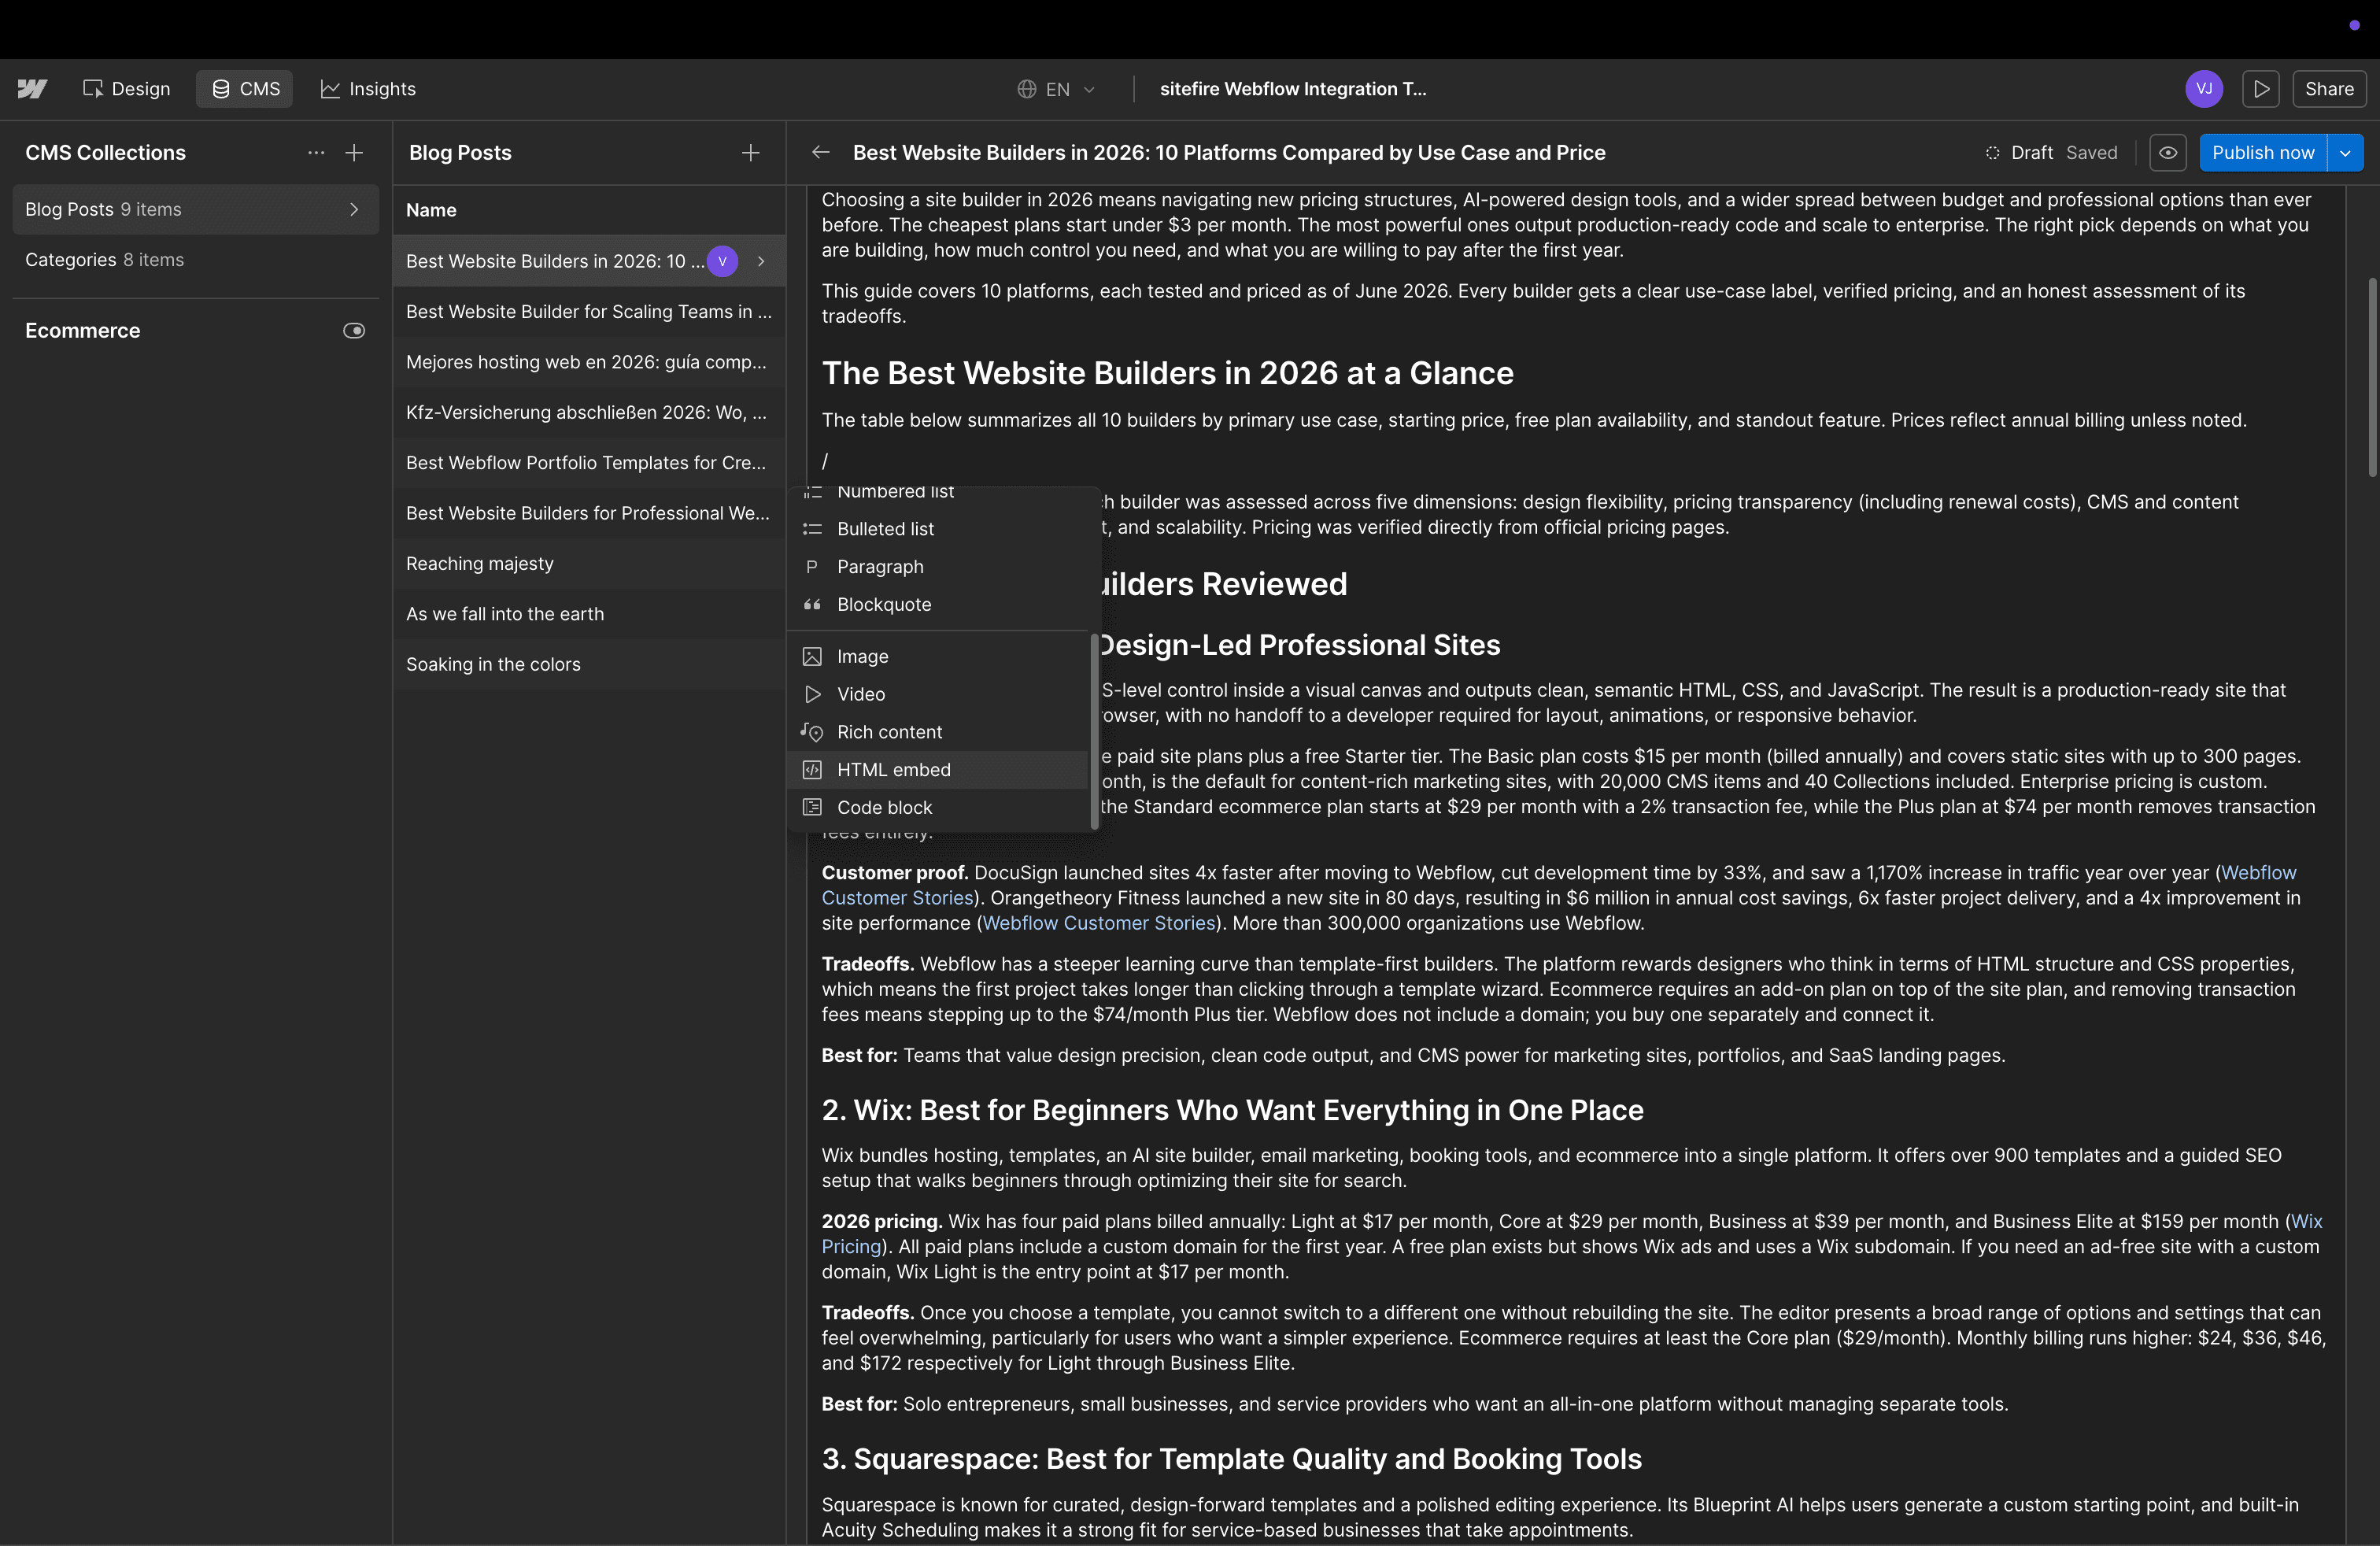
Insert an HTML Embed
With your cursor in the same spot, press / to open the rich-text component picker and choose HTML Embed.
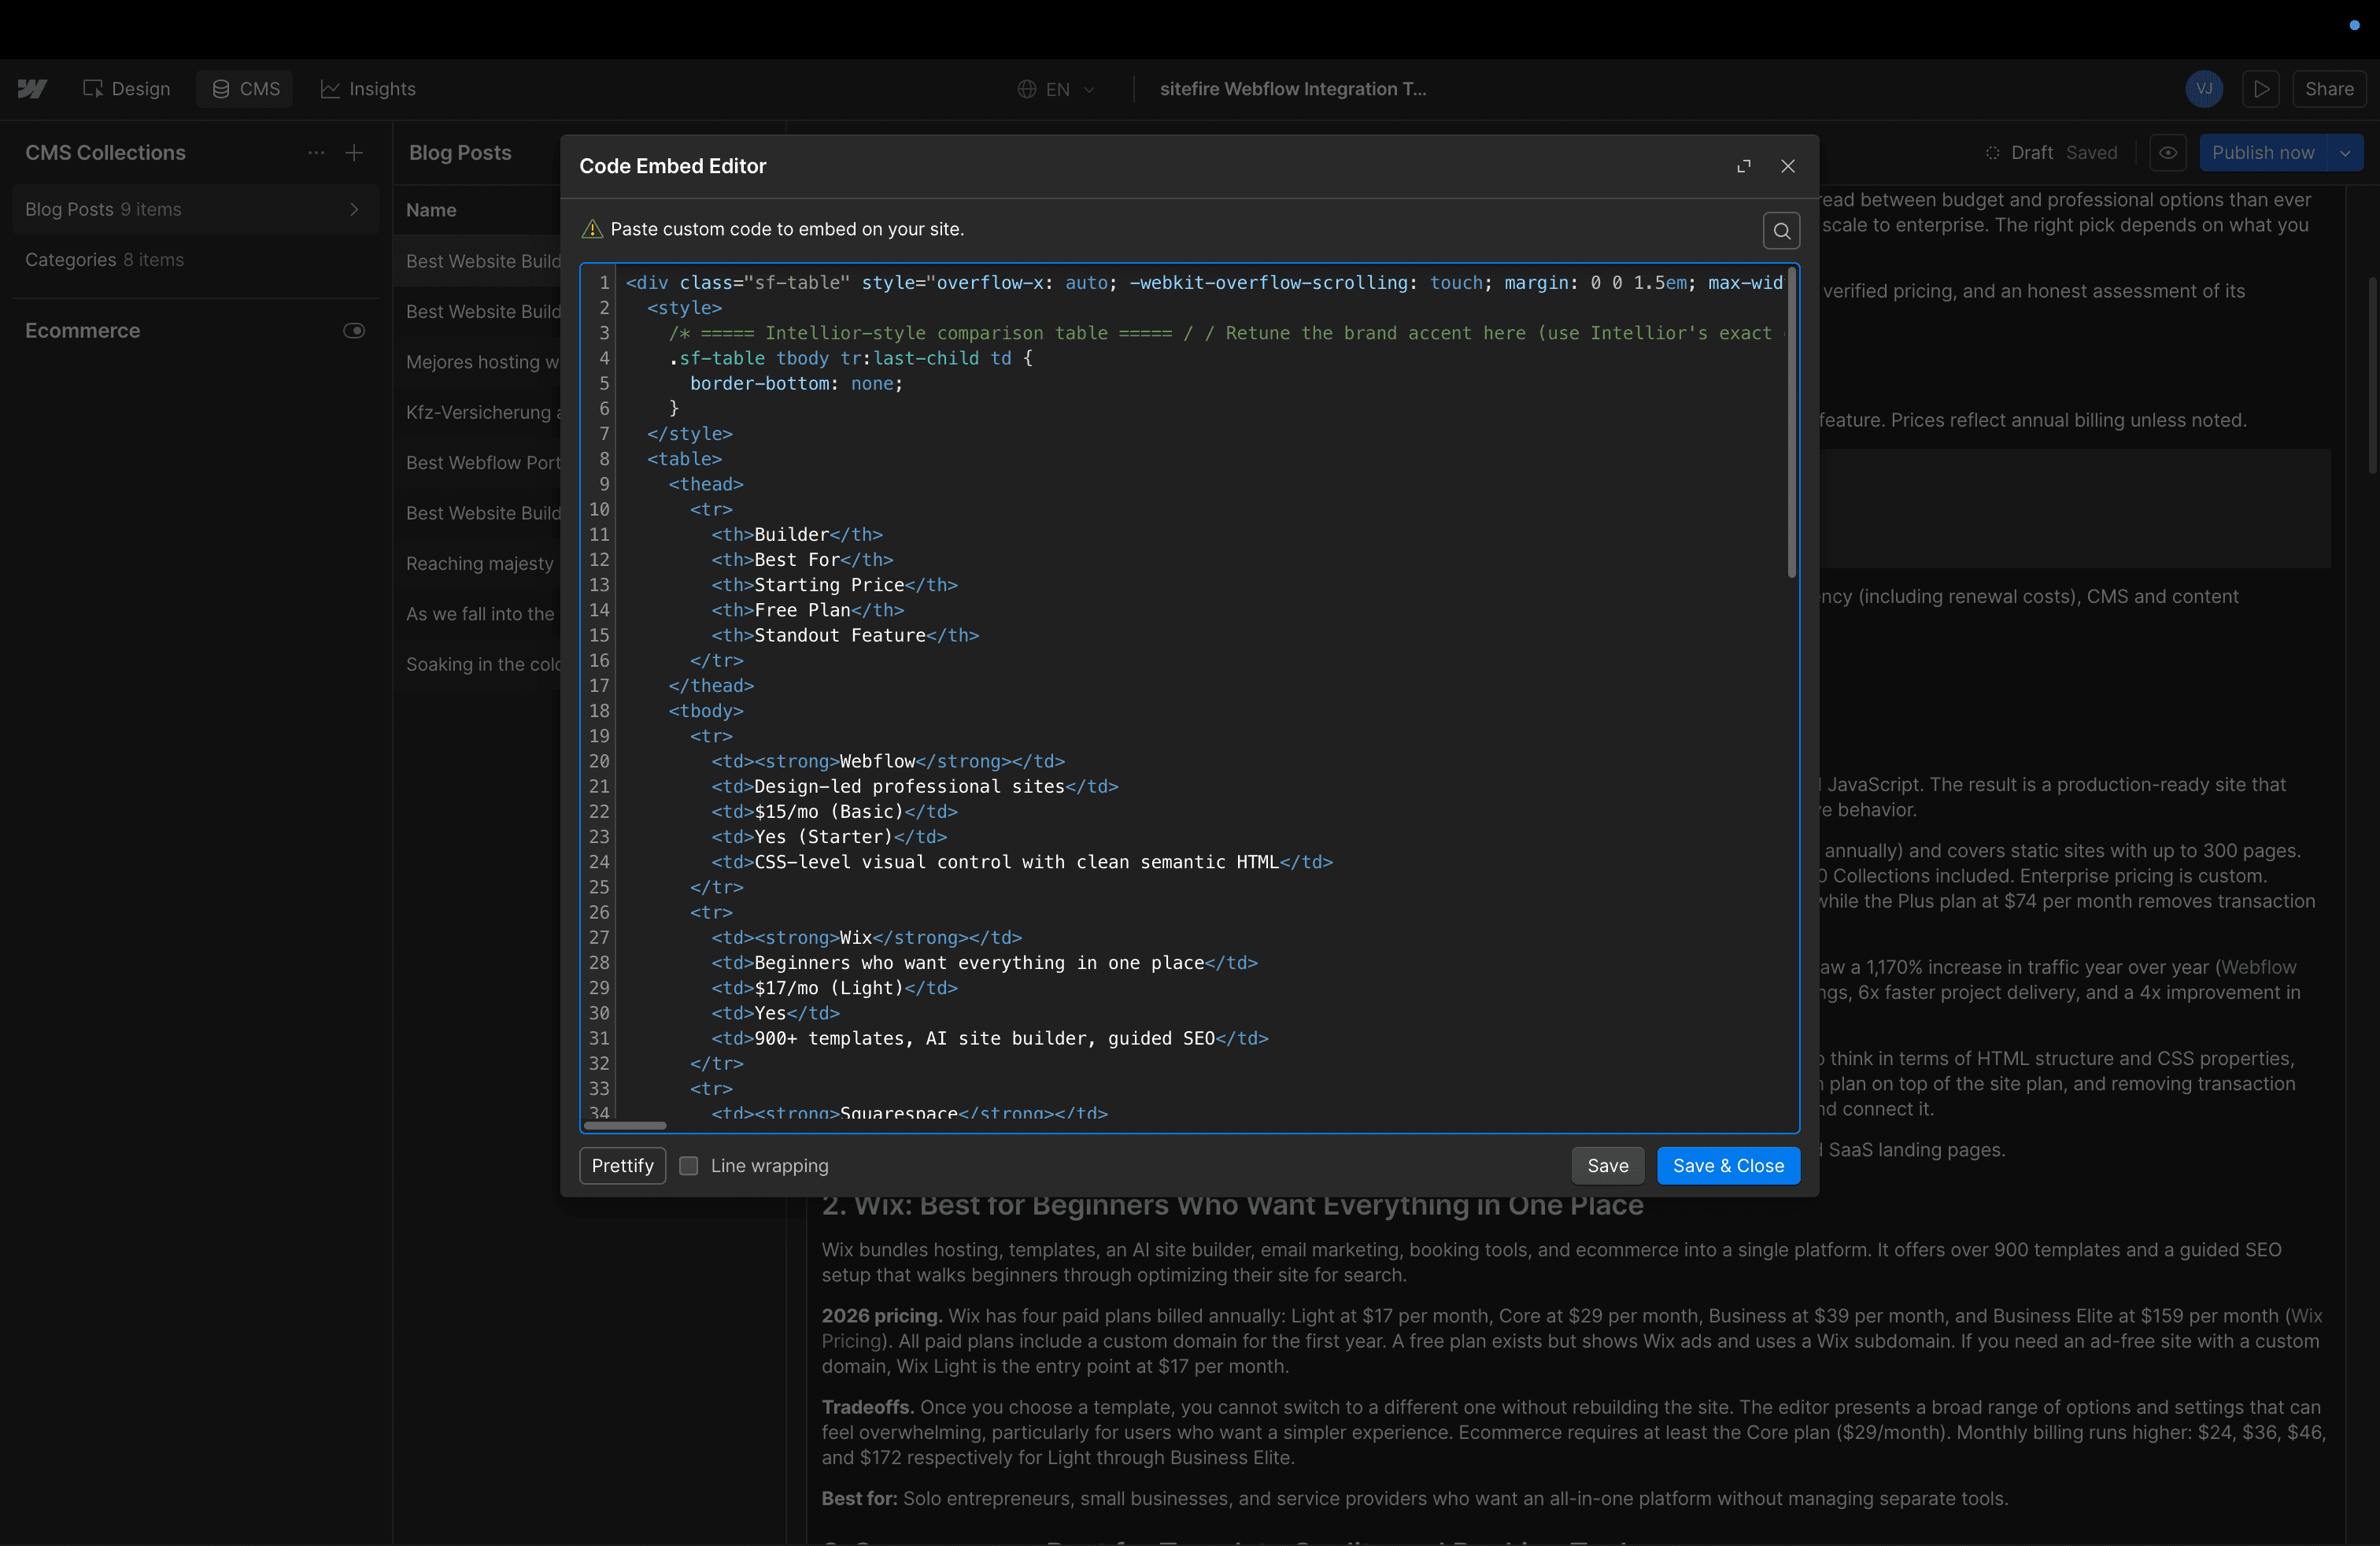
Paste the markup
Paste the table markup into the embed editor and save. Webflow will validate the HTML and close the modal.
Publish and verify
Publish the post and open it on the live site. The table should now render with the styling Sitefire applies by default.

Customizing the styling
Default table styles (borders, padding, header treatment, zebra rows) are injected by Sitefire alongside the embed. To change them, open the Webflow integration in Sitefire and adjust the table styling options - new articles will pick up the updated styles automatically.